Documentation Management Dashboard
The Documentation Management Dashboard provides administrators with a centralized interface to upload, process, and manage screen recordings that automatically generate technical documentation for the Scrollengine platform.
Overview
The Documentation Management Dashboard is part of DocuCapture, Scrollengine's automated documentation generation system. This tool allows technical writers and administrators to upload screen recordings and convert them into structured documentation pages through AI-powered analysis.
The dashboard provides real-time visibility into your documentation pipeline, including usage metrics, processing status, and completion tracking. All uploaded recordings are processed automatically and can be monitored through a comprehensive table view.
| Feature | Description |
|---|---|
| Upload Interface | Direct file upload for screen recordings with custom titles |
| Usage Tracking | Real-time metrics for monthly usage against plan limits |
| Processing Status | Live status updates for each recording's conversion progress |
| Content Management | View, organize, and delete documentation recordings |
Why Use the Documentation Dashboard
- Streamline Documentation Creation — Convert screen recordings directly into structured documentation pages
- Track Resource Usage — Monitor monthly uploads against your plan limits to optimize workflow
- Centralize Content Management — Manage all documentation recordings from a single interface
- Automate Processing — Eliminate manual documentation writing through AI-powered analysis
- Maintain Quality Control — Review and organize completed documentation before publication
Accessing the Documentation Dashboard
- Navigate to the RAG Admin panel
- In the left sidebar, locate the DOCUCAPTURE section
- Click Recordings to access the main dashboard
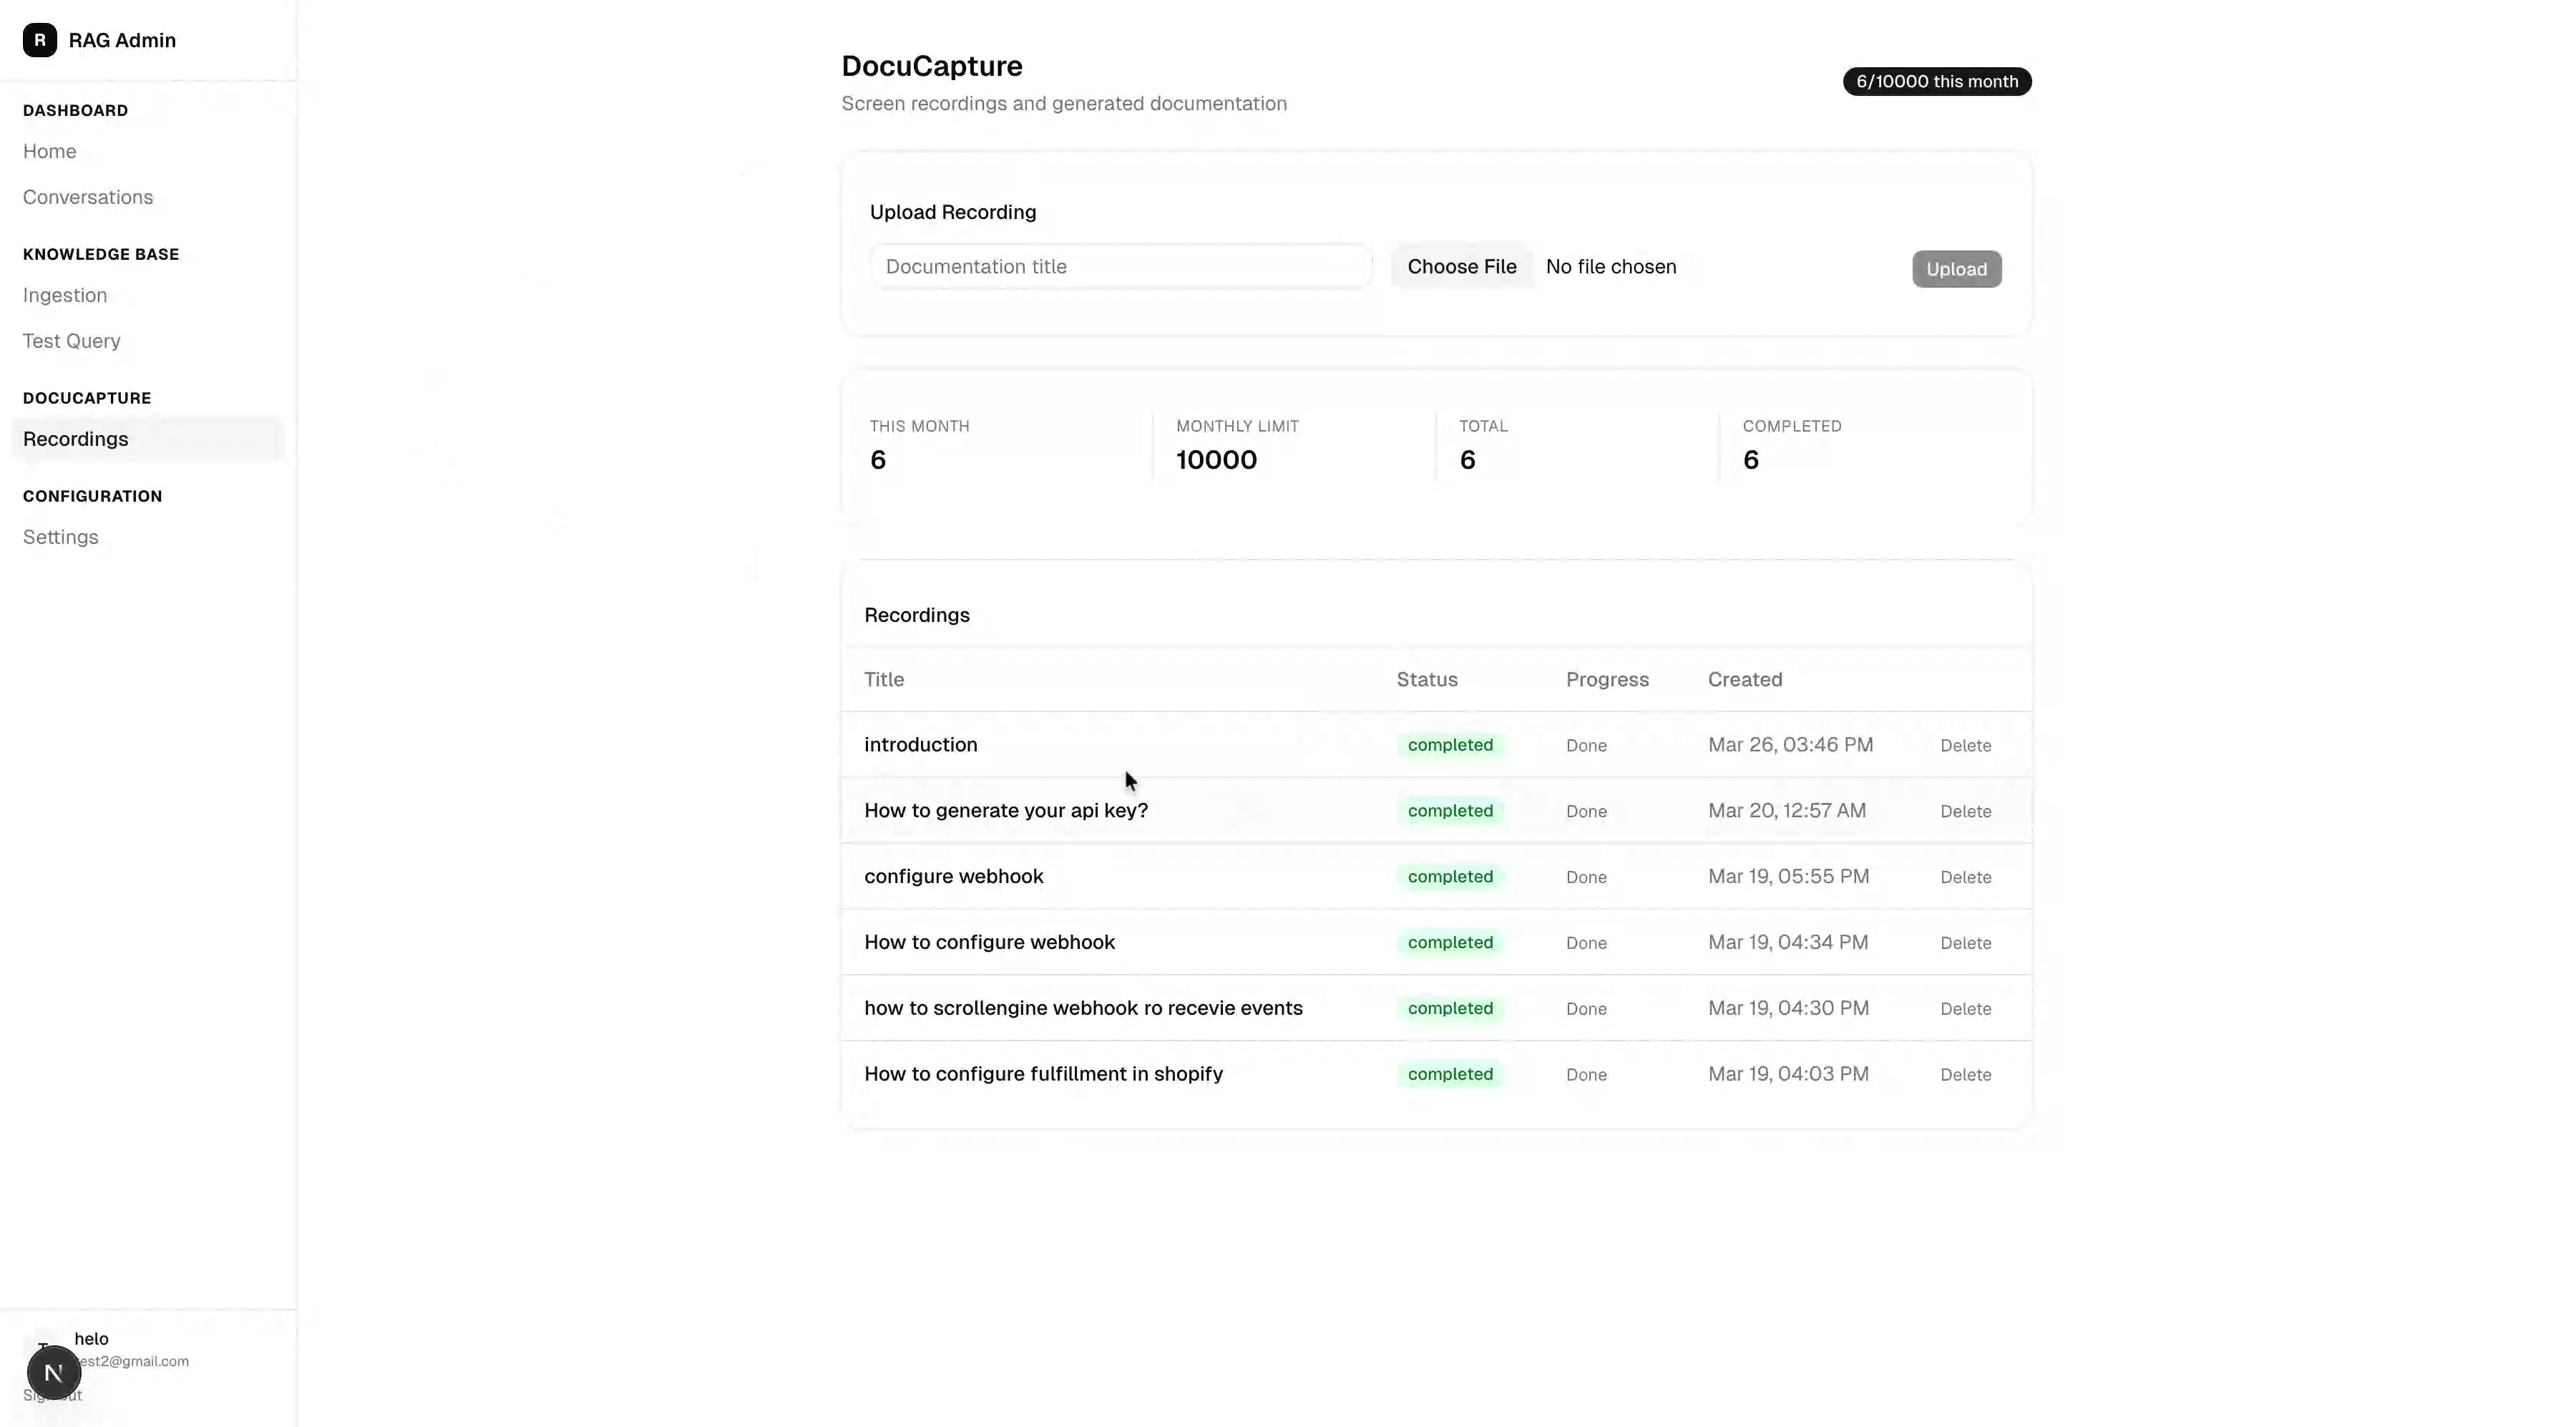
This screenshot shows the complete Documentation Management Dashboard interface, displaying the upload section, usage metrics, and recordings table.
Understanding Dashboard Components
The dashboard is organized into four main sections that provide comprehensive management capabilities:
Upload Section
The top section allows you to add new screen recordings for processing:
| Field | Description |
|---|---|
| Documentation title | Custom name for the recording that will be used in the generated documentation |
| Choose File | File selector for uploading screen recording files |
| Upload | Initiates the upload and processing workflow |
Usage Metrics
Four metric cards display your current usage status:
| Metric | Description |
|---|---|
| THIS MONTH | Number of recordings uploaded in the current billing period |
| MONTHLY LIMIT | Maximum recordings allowed per month on your current plan |
| TOTAL | All-time count of uploaded recordings |
| COMPLETED | Number of recordings that have finished processing |
Recordings Table
The main table displays all uploaded recordings with the following columns:
| Column | Description |
|---|---|
| Title | The name assigned to each recording during upload |
| Status | Current processing state (completed, processing, failed) |
| Progress | Detailed progress indicator showing completion status |
| Created | Timestamp showing when the recording was uploaded |
| Delete | Action link to remove recordings from the system |
Uploading New Recordings
- In the upload section, enter a descriptive title in the Documentation title field
- Click Choose File to select your screen recording
- Select the appropriate video file from your computer
- Click Upload to begin processing
Use clear, descriptive titles that reflect the feature or process being documented. This title will be used as the basis for the generated documentation page title.
Monitoring Processing Status
After uploading, recordings appear in the table with status indicators:
- Green "completed" badge — Recording has been fully processed and documentation generated
- Progress shows "Done" — All processing steps have been completed successfully
- Timestamp — Shows when the recording was originally uploaded
Processing typically completes within minutes, depending on recording length and system load.
Managing Existing Recordings
Use the recordings table to organize and maintain your documentation library:
- Review the Status column to identify completed recordings
- Check Progress for any recordings that may have encountered issues
- Use the Delete action to remove outdated or incorrect recordings
- Sort by Created timestamp to find recent uploads
Deleting a recording permanently removes it from the system and cannot be undone. Ensure you no longer need the recording before deletion.
Best Practices
- Use descriptive titles that clearly indicate the feature or process being documented
- Monitor your monthly usage to stay within plan limits and avoid processing delays
- Review completed recordings promptly to ensure quality and accuracy
- Delete outdated recordings to keep your dashboard organized and maintain storage efficiency
- Upload recordings during off-peak hours for faster processing times
Troubleshooting
| Issue | Solution |
|---|---|
| Upload fails | Verify file format is supported and file size is within limits |
| Recording stuck in processing | Wait 10-15 minutes, then contact support if status doesn't update |
| Dashboard not loading | Clear browser cache and refresh, or try a different browser |
| Delete action not working | Ensure you have admin permissions and the recording is not currently processing |
| Usage metrics not updating | Metrics refresh every few minutes; wait briefly and reload the page |